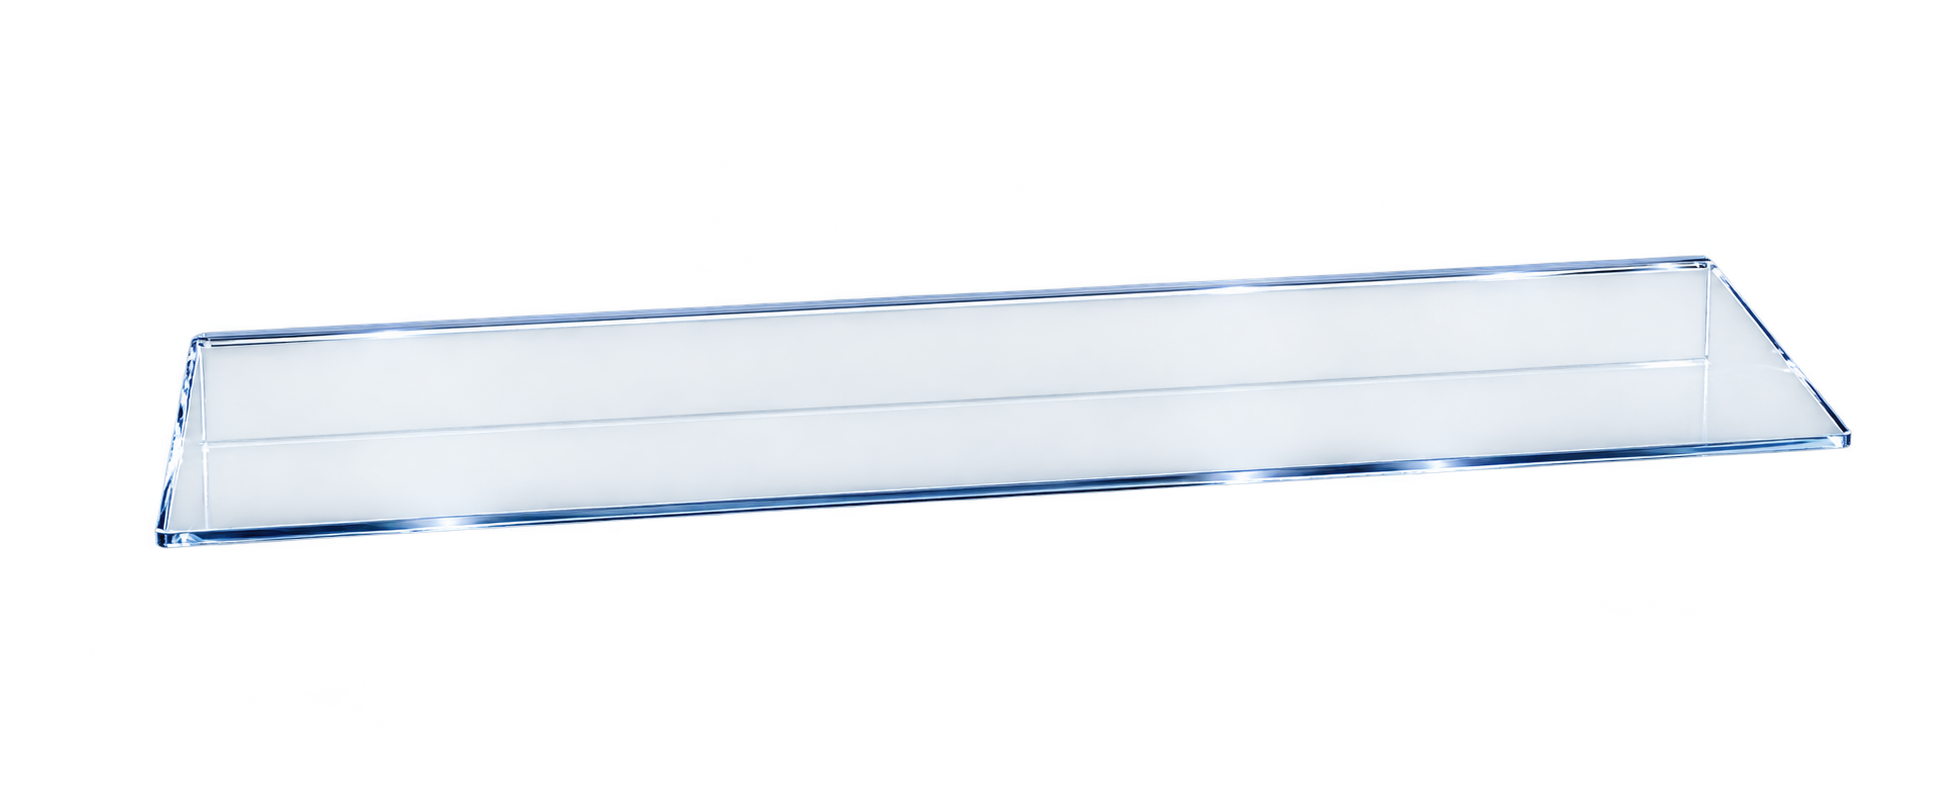
 Floating Shelves
How to install your acrylic shelf
Choose your mounting method. Each guide takes you from preparation to the finished shelf.
Clear acrylic can be hard to notice. Keep the shelf away from walking paths and face or eye level where someone could bump into it. Take extra care around children and pets. Edges should be smooth and rounded; do not install a shelf with sharp or chipped edges.
A secure fixing at every mounting point
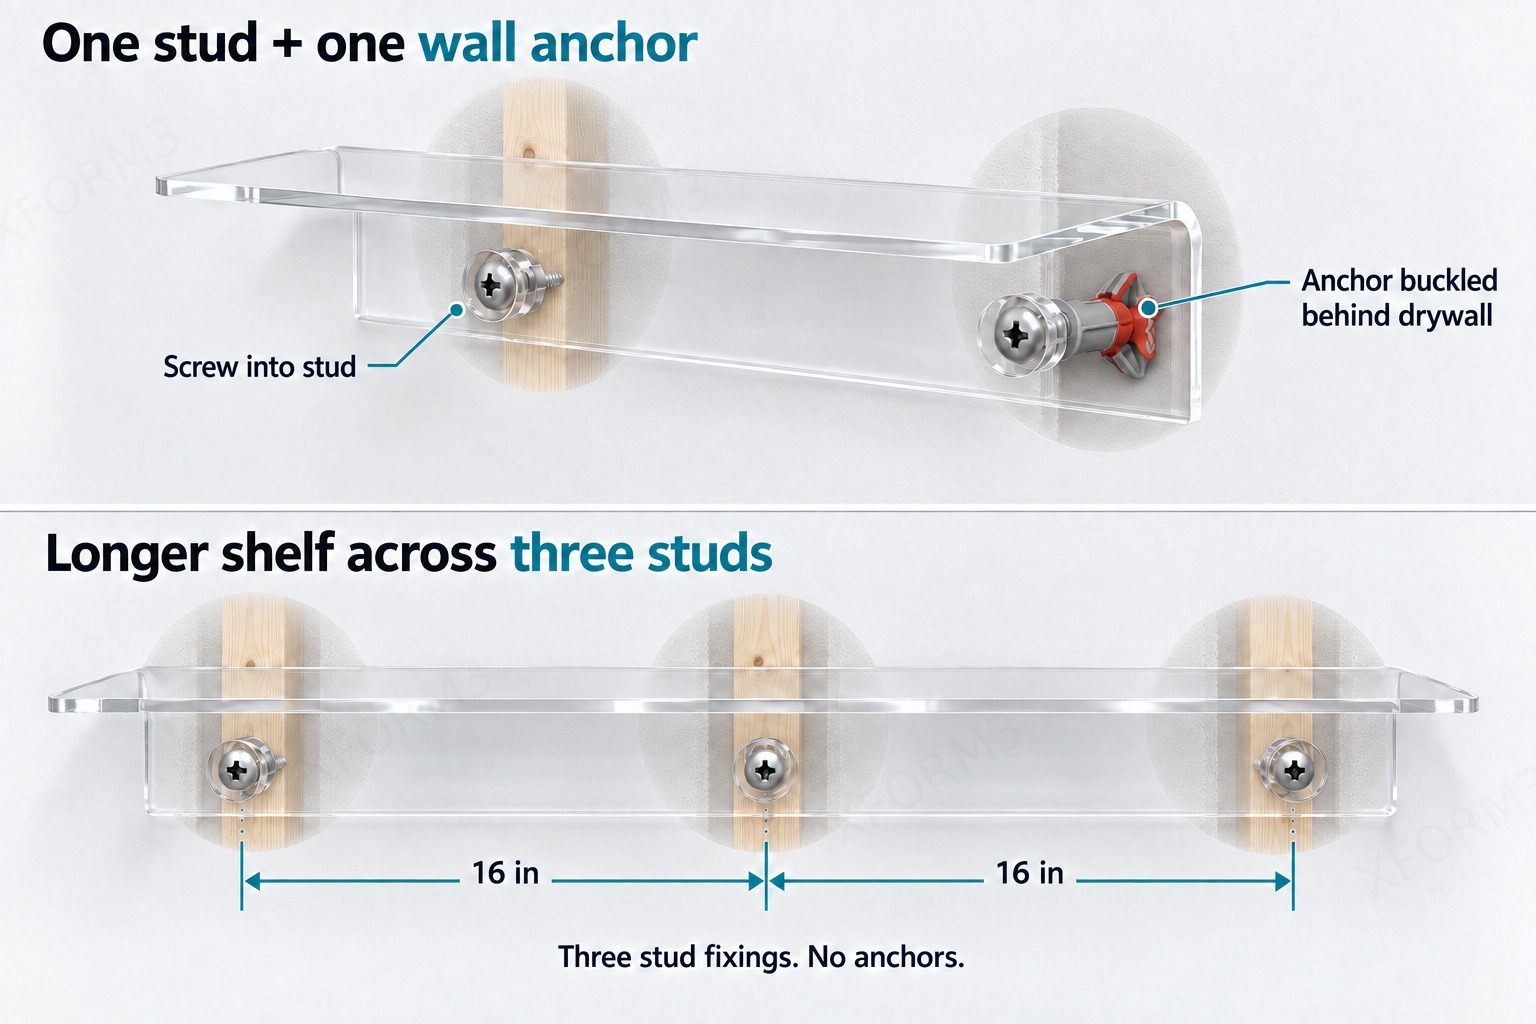
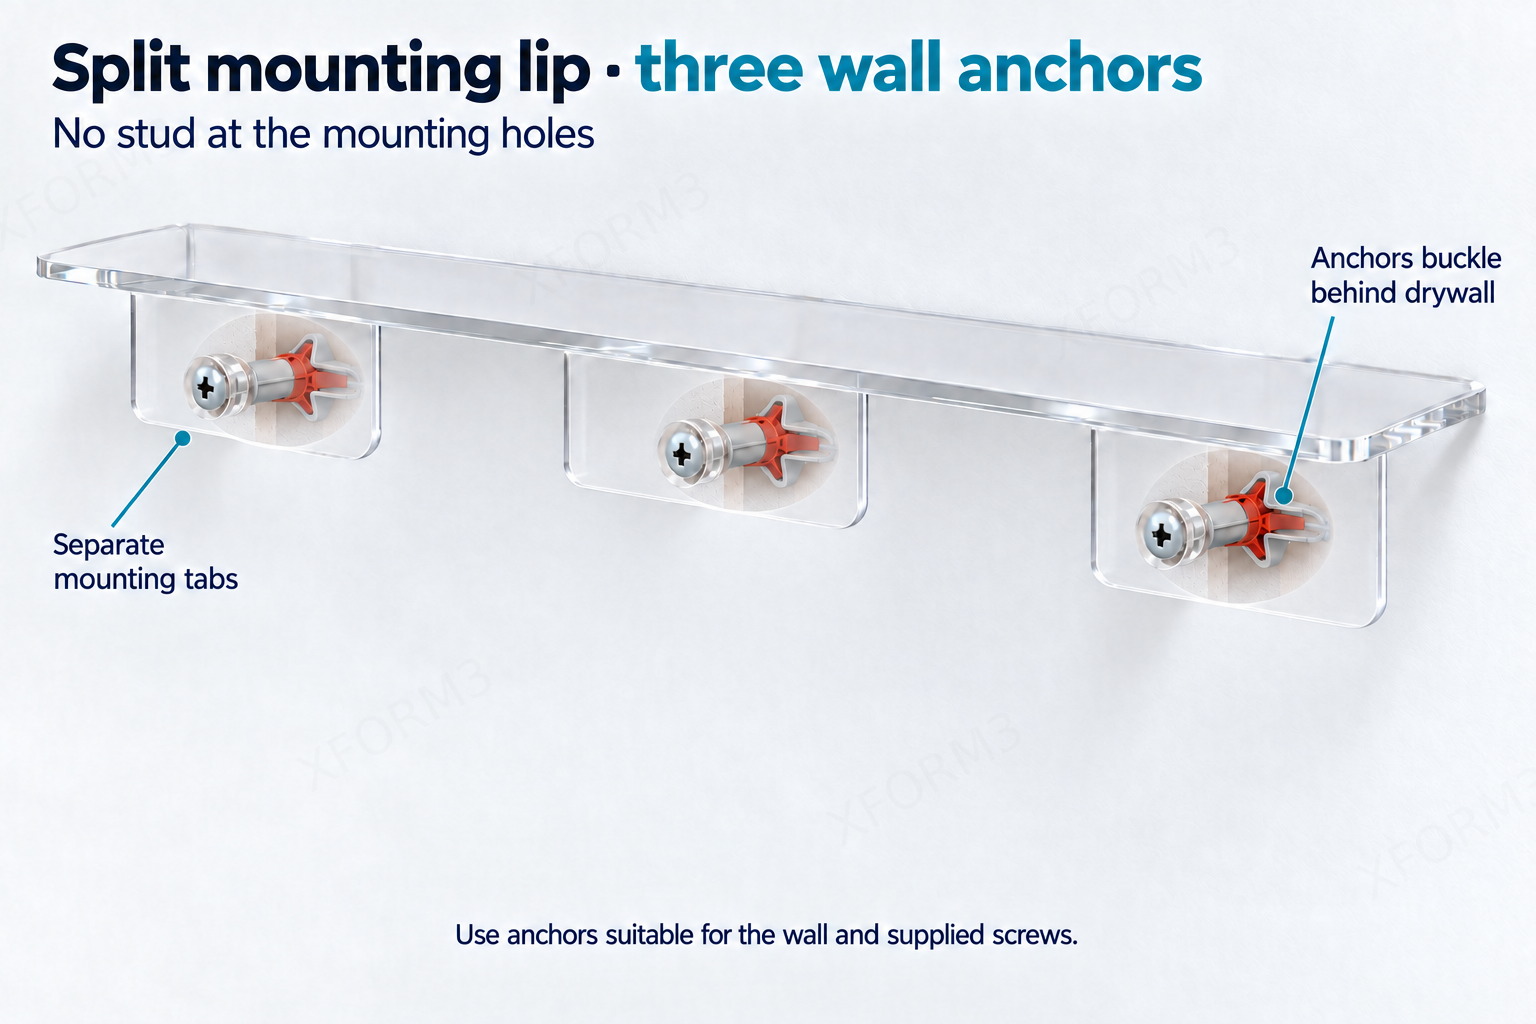
Keep the protective paper on while working. Use a screw into a stud where a hole aligns with wood, and a suitable wall anchor where it does not.
Know the mounting parts
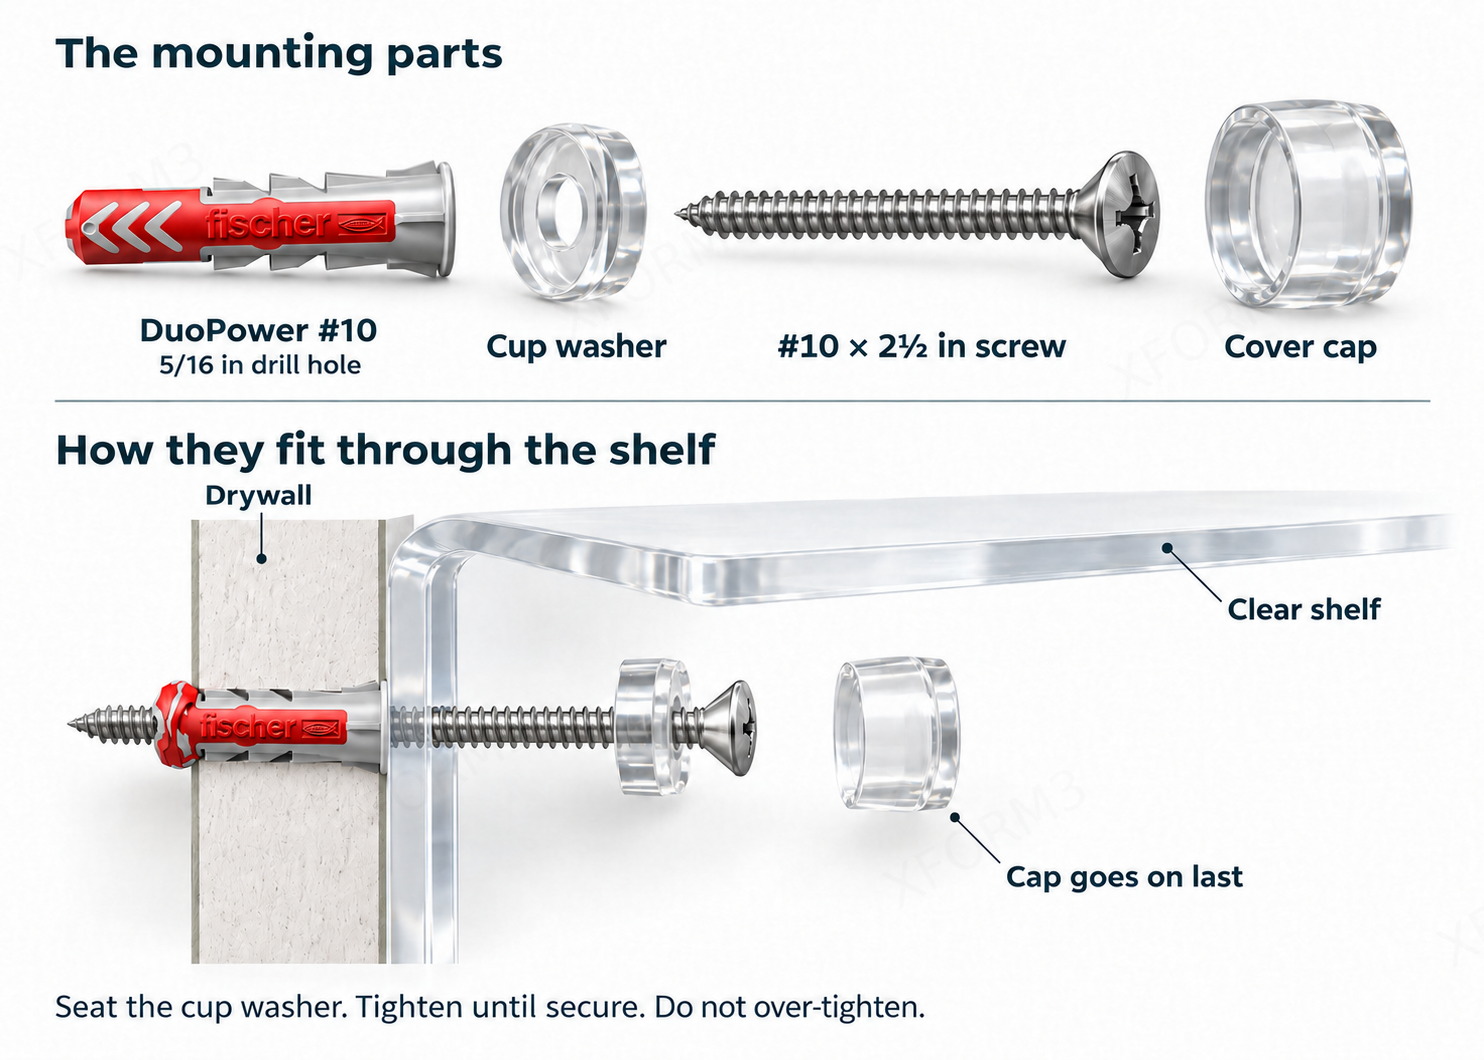
Using your own screws
A different screw may be used if its head seats correctly in the supplied cup washer, the cap fits over it, and its size and length suit the wall fixing. Do not let the screw head bear directly on the shelf acrylic.
Prepare the shelf
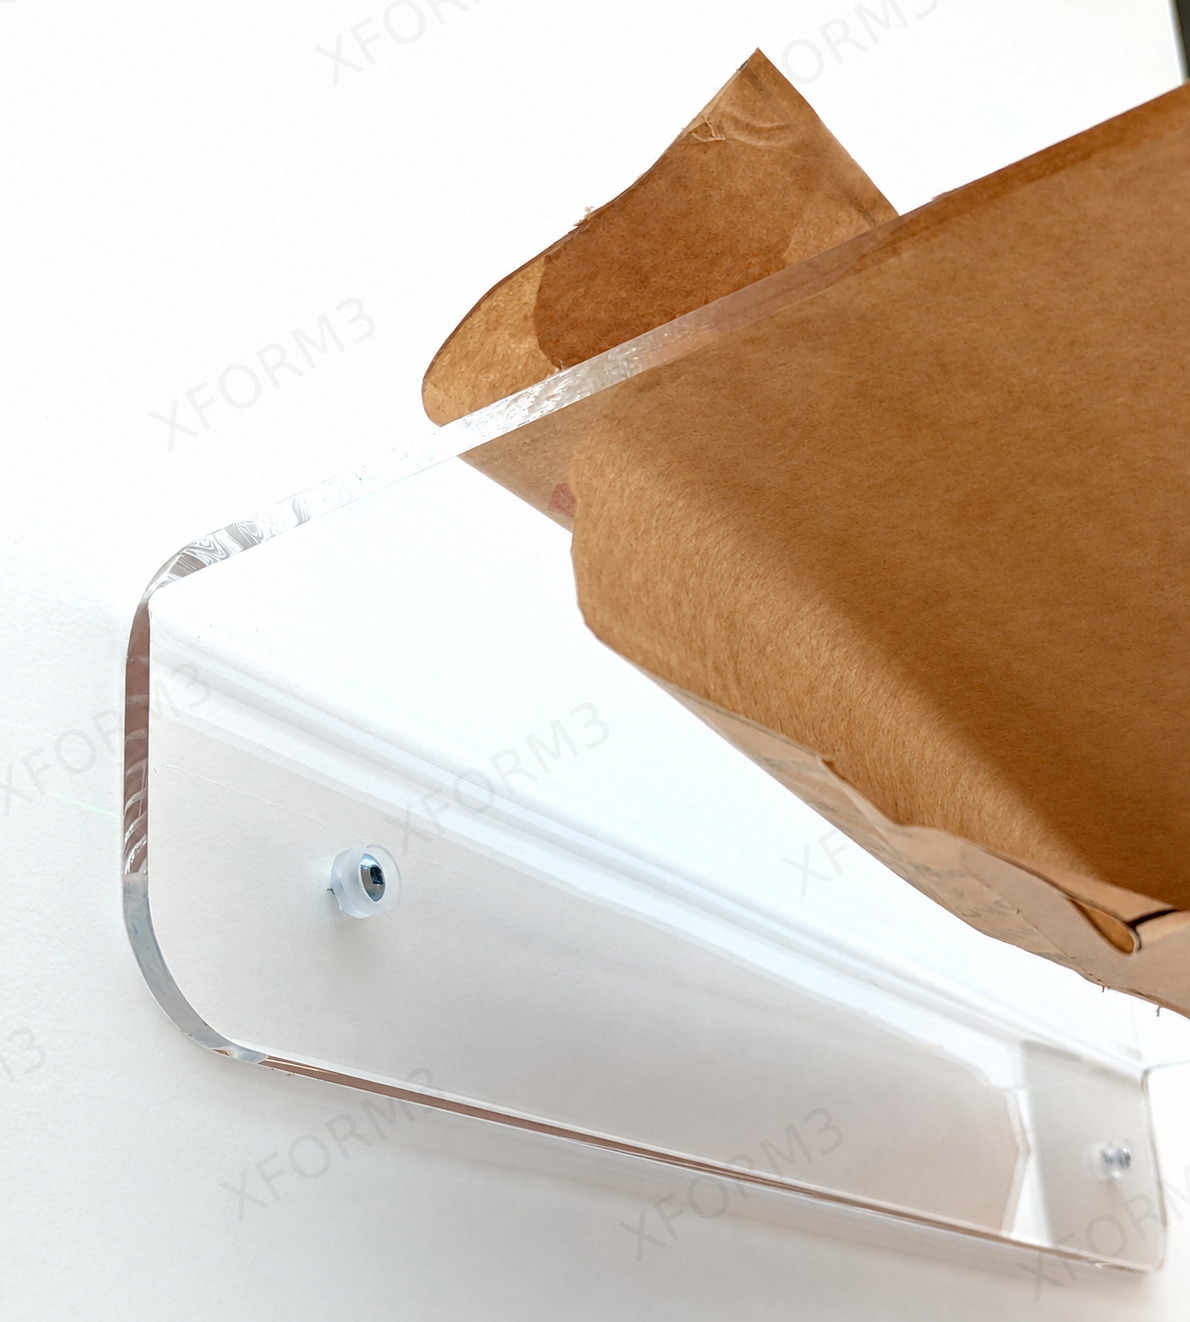
Peel the paper back only around the mounting lip or separate mounting tabs, on both sides as needed. Leave the rest on until installation is complete.
Wipe the wall-facing acrylic clean. Hold the shelf level at the intended position and mark the wall through its factory holes.
Match the fixing to the wall
Locate the studs and check every mounting hole. Stud spacing is commonly 16 inches on center, but framing and shelf hole patterns vary. Use every required mounting point for your shelf.
Outer-hole spacing: for shelves 16 inches long and up, the default hole-center inset from each end is 2 inches. A 1.5-inch inset is used only when it enables a 16-inch stud-mounting span. Shorter shelves retain the 1.5-inch default. Check the factory holes against your wall before marking.
Drill and prepare the wall fixings
Set the shelf aside. Check for concealed wires and pipes before drilling. For the illustrated #10 DuoPower anchor, use the specified 5/16-inch drill bit; follow the supplied anchor instructions for hole depth and wall suitability. Clear the drilling dust, then insert the anchor as directed.
At a stud, prepare the pilot hole appropriate for the supplied screw and the wood. Do not put a plastic wall anchor into the stud.
Optional: drilling an additional hole in the shelf lip
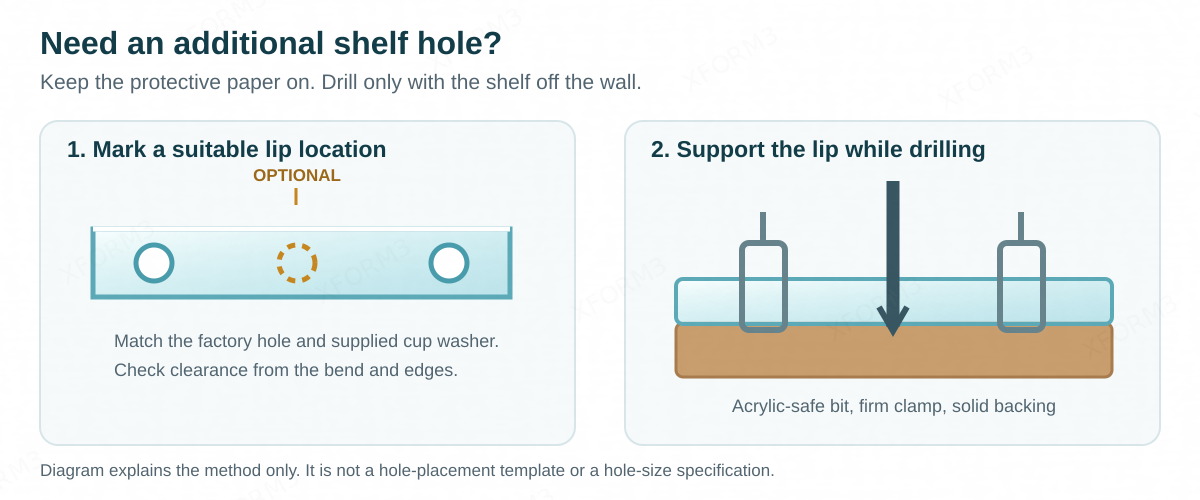
With the shelf off the wall and its paper still on, confirm the new position is clear of the bend and edges. Match the factory hole and supplied cup washer. Clamp the lip against clean, solid backing and use a bit intended for acrylic. Clear chips and avoid forcing or overheating the material. Do not install cracked acrylic. Ask Xform3 if you are unsure about hole size or placement.
Fasten, then fit the covers
Return the shelf to the wall. Seat a cup washer in each mounting hole, with its cup facing the screw head. Pass the screw through the washer and into the prepared fixing. Tighten gradually until the shelf is secure.
Blow or wipe drilling dust from behind and underneath the mounting lip or tabs, so the acrylic sits flat against the wall.
Stop when the washer is seated and the shelf is secure. Extra turns can crack paint or acrylic, especially when driving into a stud.
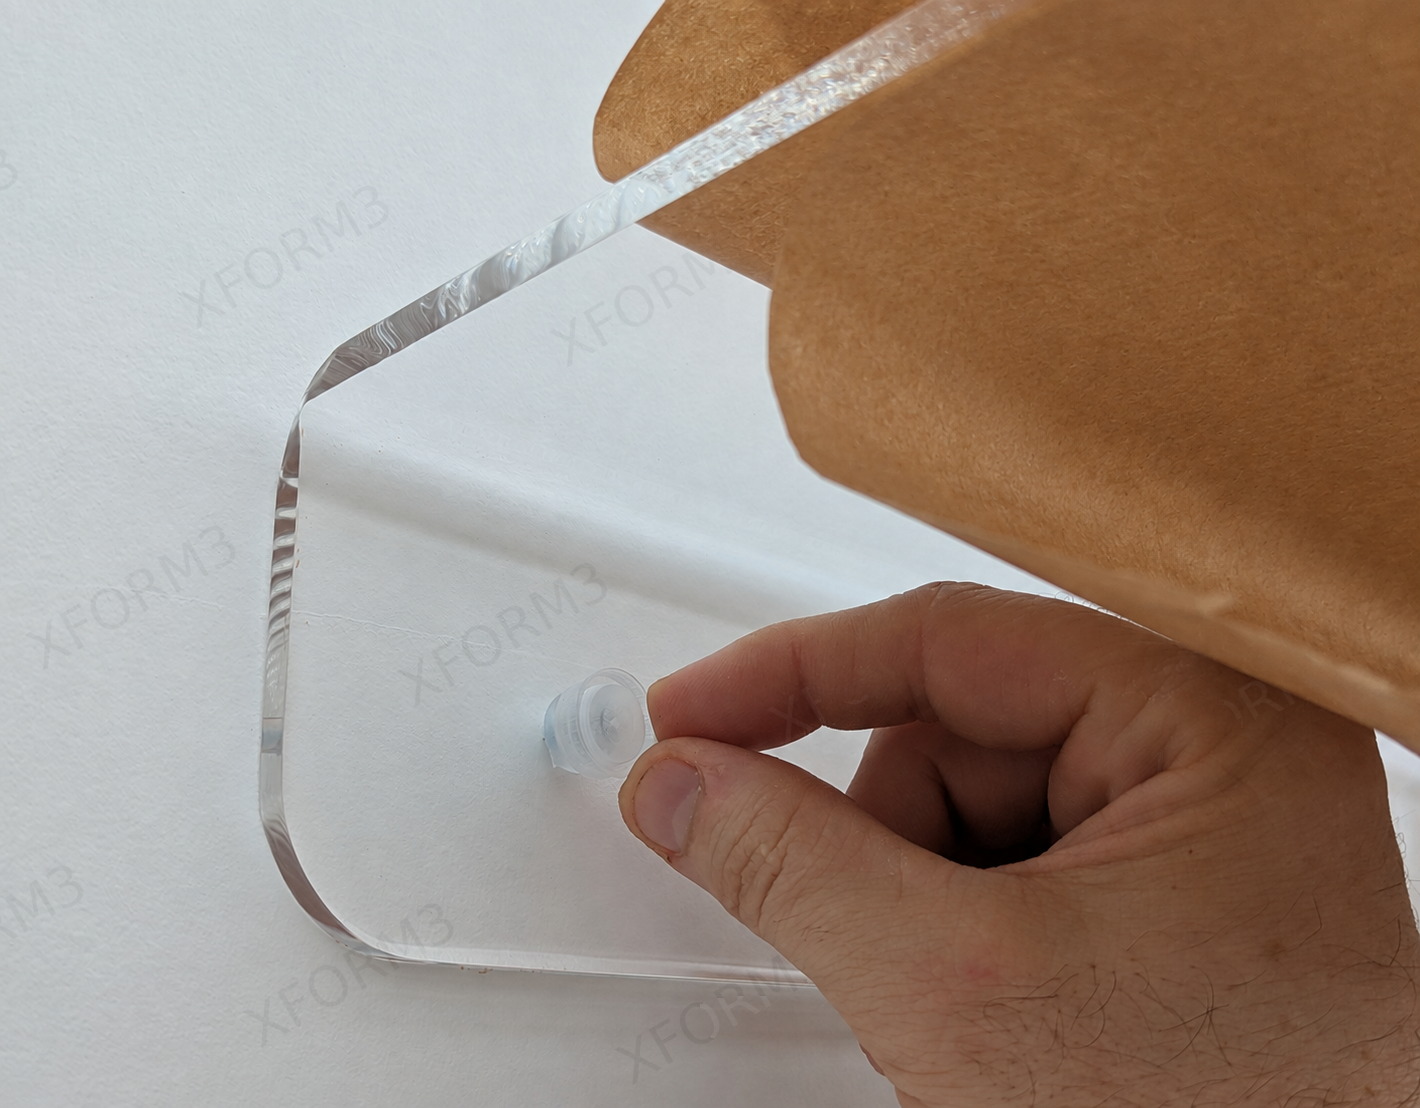
Cover the screw heads
Align each clear cover with its cup washer and press it into place. If it does not seat, check the alignment and screw-head fit instead of forcing it.
Peel the paper and check the shelf
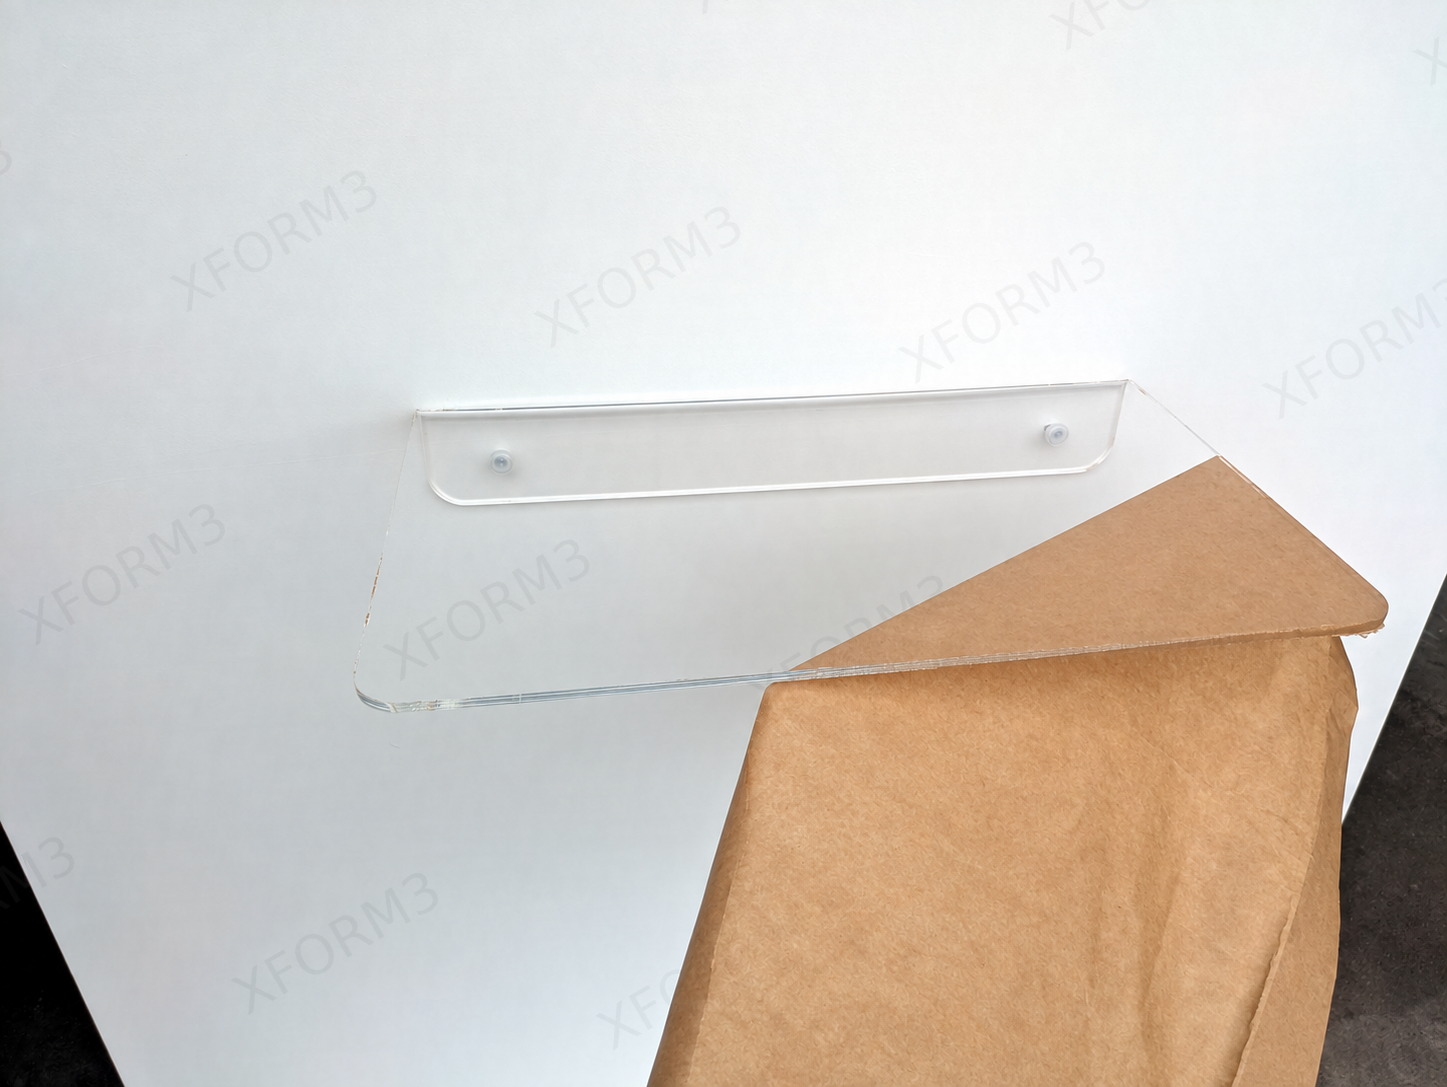
Once all fixings are secure and the caps are in place, remove the remaining protective paper from the shelf faces and edges.
Check that the shelf is secure and positioned safely before placing items on it. Follow the load guidance supplied for your shelf and mounting arrangement.
Hardware reference: Fischer DuoPower US sizes and instructions. Illustrations explain assembly and wall layouts; anchor deformation varies with the wall and product.
A clean surface makes the difference
We supply Alien Tape with tape-mount shelf orders. Adhesion varies with the surface, shelf size, tape contact area, and what you place on the shelf.
Check and test the surface
Smooth, flat, non-porous surfaces are the best starting point. The tape must contact both the acrylic lip and the mounting surface fully.
Test a small strip in an inconspicuous spot before installing the shelf. Different finishes behave differently, even when they look similar.
Alien Tape can pull away paint, damage drywall, or leave residue. Its maker treats these applications as permanent. Choose another suitable surface if clean removal matters.
Using Command strips or another mounting tape
Alternative products may work when their manufacturer allows the surface and this type of shelf mounting. Follow the exact product's load, preparation, application, and removal instructions. A picture-hanging rating is not automatically a rating for a projecting shelf. Ask us if you are unsure which product to use.
Standard Command strips are single-use: use fresh strips when reinstalling. Do not follow Alien Tape's washing instructions for Command strips. Keep any removal tabs accessible.
Prepare, align, and press
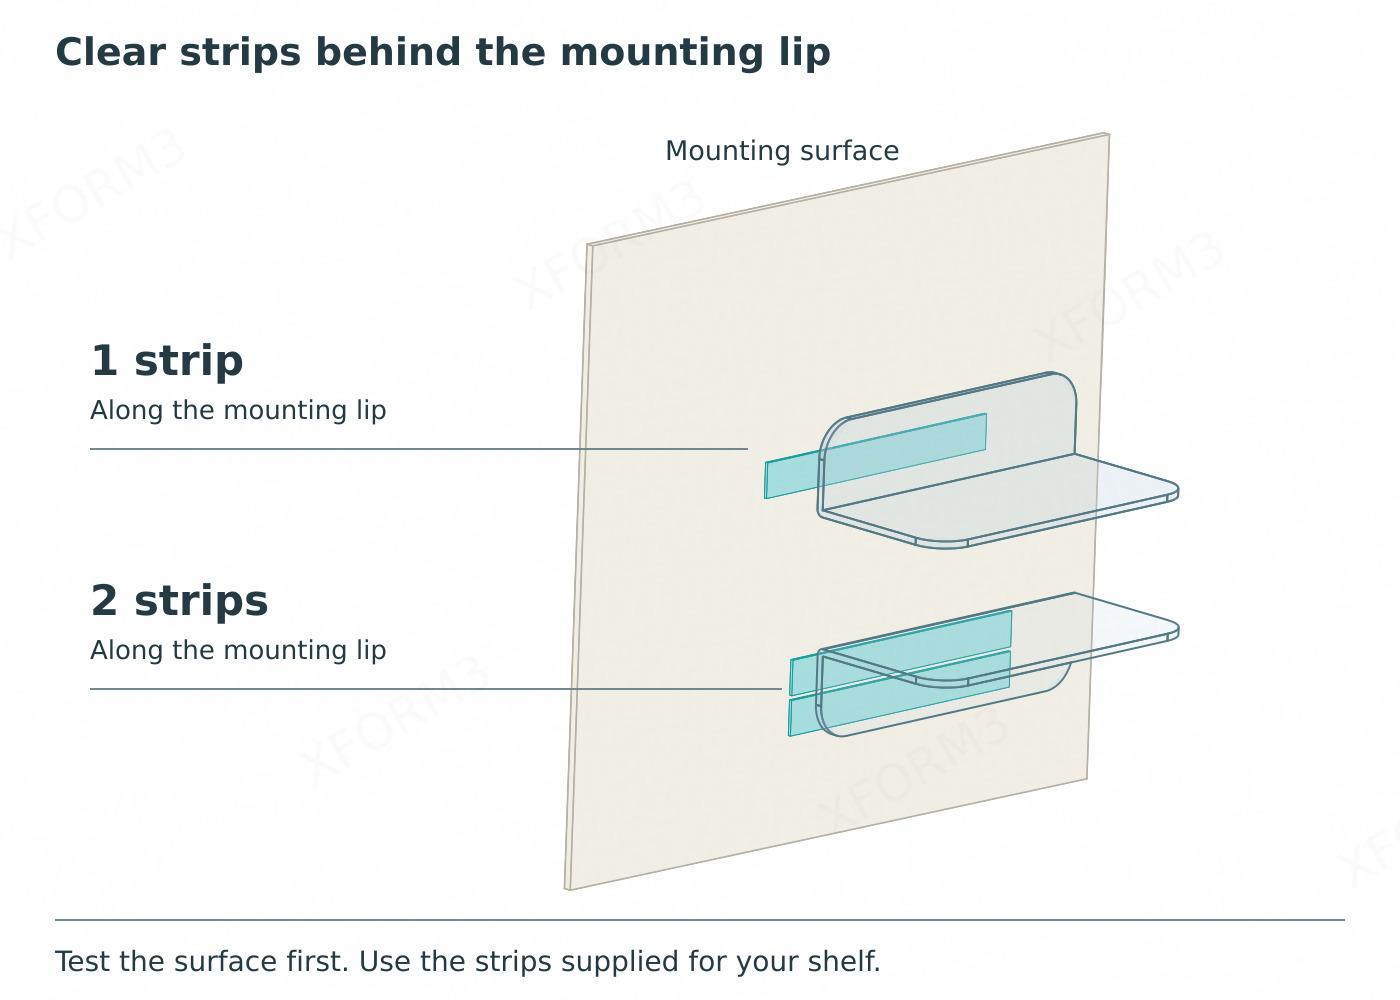
- Keep the shelf protected. Leave the brown paper on the shelf faces. Expose only the mounting-lip contact area.
- Clean and dry both surfaces. Remove dust, oil, and moisture. Use an acrylic-safe cleaner on the shelf.
- Apply the strips. Either place them on the wall first, then align the shelf, or put them on the back of the lip first, then align it with the wall. Keep the contact area flat and avoid touching the adhesive.
- Press firmly along the whole strip. Follow your Alien Tape package's application and waiting directions. Support the shelf while checking the bond. Peel the remaining paper only once the shelf is secure.
Load gradually and watch the bond
A strong bond on a suitable smooth surface may support approximately 5 to 10 lb, but this is an installation-dependent estimate, not a rated or guaranteed capacity. Contact us with the shelf size, wall surface, tape product, and intended items before relying on that load. Follow any lower limit supplied with the shelf or tape.
More tape contact, two strips, or a longer shelf can improve adhesion, but does not automatically establish a higher load limit. Start with light items and check for lifting tape, movement, or a changing shelf angle.
A bond can release over time. Avoid valuable, fragile, or hazardous items and locations where falling contents could hurt someone. Acrylic is lightweight, but a fall can still damage the shelf or its contents. Unload it if the bond starts to move.
Optional extra upward tilt
Tell us about your installation before ordering. You can request extra upward inclination to account for the tape layer and your preferred resting angle. We can advise on the shelf, surface, and items you plan to use. Extra tilt does not increase the tape's load rating or repair a failing bond.
Remove and reuse Alien Tape
Unload and support the shelf first. Work the tape free slowly, following its package directions. Do not yank the shelf or force the acrylic to bend. Smooth glass, tile, and metal may allow removal, but no finish is guaranteed damage-free; the bond can become more permanent with age.
For reusable Alien Tape, rinse the removed strip with water and let it dry completely before applying it again. Never reinstall wet tape. Replace tape that remains dirty, damaged, or does not bond properly.
If removal is difficult, contact us before forcing it. Water at the tape edge may help with removal where the surface and product instructions allow it, but it does not guarantee paint protection.
Product directions: Alien Tape instructions, Alien Tape Easy Cut instructions, and Command product guidance. Follow the instructions for the tape actually supplied.
Care after installation
Use a soft microfiber cloth, dry or lightly dampened with water. Choose an acrylic-safe cleaner when needed and avoid abrasive cleaners. Keep the shelf visible and clear of traffic or play areas. Stop using it if an edge becomes sharp or chipped, or if the mounting loosens.